
Introduction
There is a cut of beef sitting in most grocery store cases that home cooks consistently walk past, and that is a mistake. The boneless short rib is one of the most forgiving, deeply flavorful cuts you can cook, yet most recipes either braise it into oblivion or treat it like a steak without adjusting the technique. After cooking this cut dozens of times, I have landed on five hacks that transform it every single time, whether you have 30 minutes or 4 hours.
Why This Recipe Works
Boneless short ribs come from the chuck area, which means they are loaded with collagen and intramuscular fat. When cooked low and slow, that collagen converts to gelatin, creating the silky, rich texture that makes this cut special. These five hacks work with that biology rather than against it.
My Story With This Cut
The first time I cooked boneless short ribs, I treated them like a regular steak. Big mistake. The result was tough, dry, and honestly embarrassing to serve.
That failure sent me on a two-year journey of testing braising, searing, slow-cooking, and pressure-cooking. I burned batches, underseasoned others, and once left them in the oven an hour too long, which accidentally became the best version I ever made.
Everything I learned is in this article. Not a recipe I found online and rewrote, but one I built from real mistakes in my own kitchen. Let’s get into it.
Ingredients

- 2 lbs boneless short ribs
- 1 tbsp kosher salt
- 1 tsp black pepper
- 1 tsp smoked paprika
- 2 tbsp neutral oil (avocado or grapeseed)
- 4 garlic cloves, smashed
- 1 cup beef broth
- 1 tbsp Worcestershire sauce
- 1 sprig fresh rosemary
Substitution : No beef broth? Use chicken broth + 1 tsp soy sauce for similar depth.
Timing
- Prep: 15 minutes
- Cook: 2 h 30 min (oven) or 35 min (pressure cooker)
- Total: ~2h 45m
I always salt the meat the night before when I can; it makes a noticeable difference in the crust.
Step-by-Step Instructions
Hack 1: Dry brine overnight

Season generously with salt and pepper, and leave uncovered in the fridge for at least 4 hours (overnight is better). This draws moisture to the surface, then reabsorbs it seasoned. The result is a deeper, more even flavor all the way through.
Hack 2: Sear at very high heat

Get your pan smoking hot before the meat goes in. I use a cast iron skillet for 2 minutes per side, with no touching. This is where the Maillard reaction happens and where 80% of the flavor comes from. Do not skip this step even for slow cooker recipes.
Hack 3: Deglaze properly

After searing, add the garlic and cook 30 seconds, then pour in broth and Worcestershire. Scrape every brown bit off the bottom; that fond is pure flavor. This is the base of your braising liquid.
Hack 4: Cook low and slow (or fast under pressure)

Cover and braise at 300°F (150°C) for 2.5 hours, or use a pressure cooker for 35 minutes at high pressure. The trick here is not opening the lid during cooking; the steam does the work.
Hack 5: Rest before serving

Let the meat rest in the liquid for 15 minutes off the heat. I know it is tempting to serve immediately, but this step lets the juices redistribute and the sauce thicken slightly on its own.
Nutritional Information
Per serving (serves 4) — estimated values :
| Nutrient | Amount |
|---|---|
| Calories | 480 kcal |
| Protein | 38g |
| Total fat | 34g |
| Saturated fat | 13g |
| Carbohydrates | 3g |
| Sodium | 620mg |
Serving Suggestions
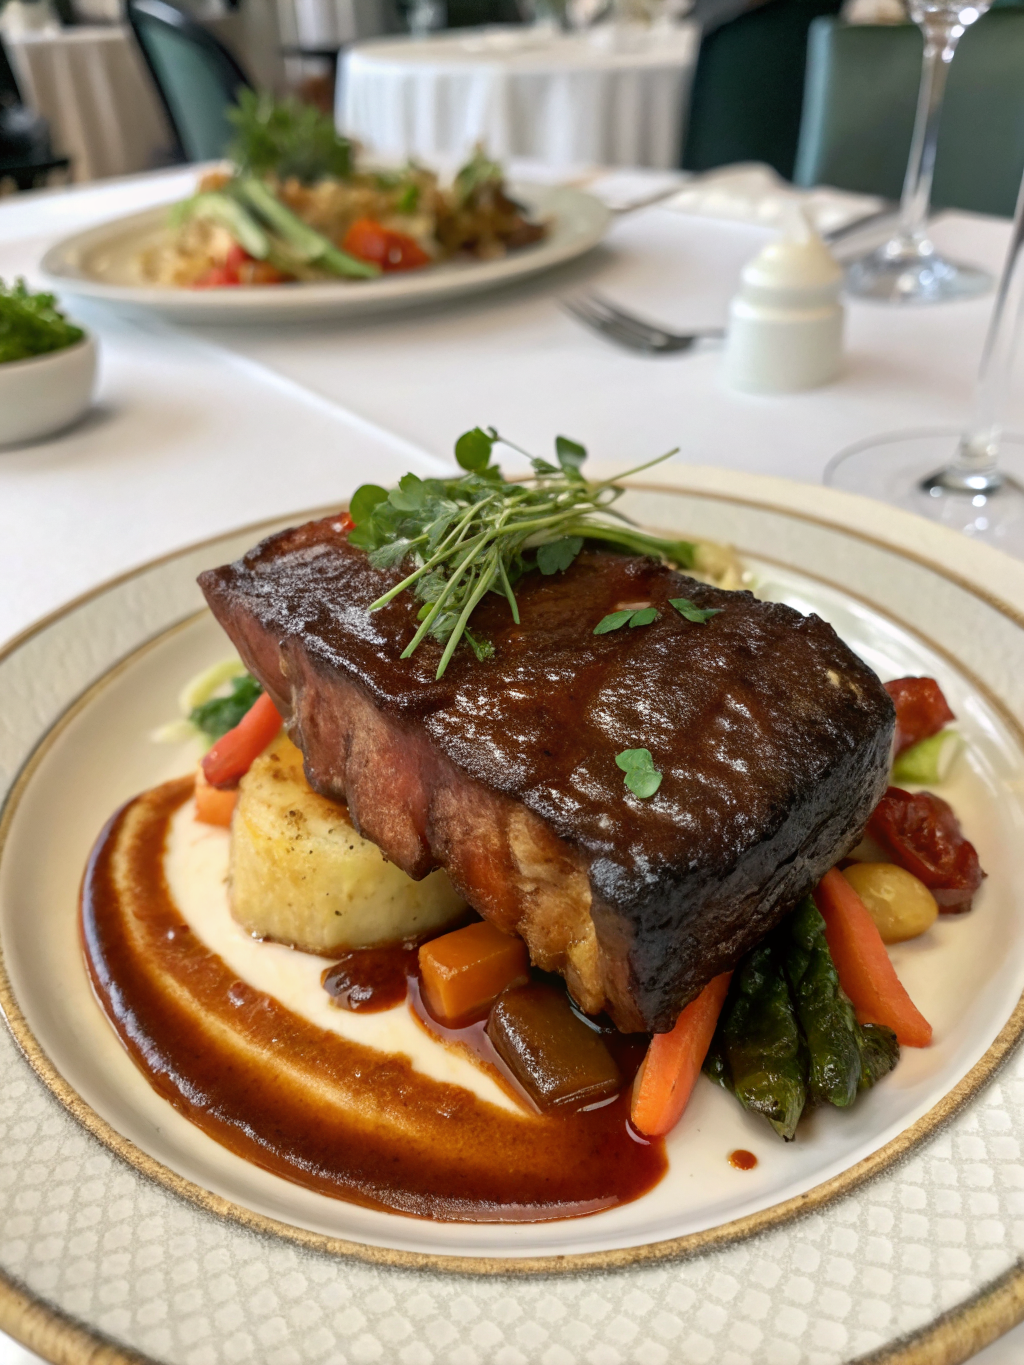
- Shred the meat and serve over creamy polenta with the braising liquid reduced as a sauce
- Slice thick and serve alongside roasted root vegetables and a horseradish cream
- Pull apart and pile into toasted brioche buns with pickled red onions for a weekend sandwich
Common Mistakes to Avoid
- Skipping the sear: braising without searing produces grey, bland meat with no crust character
- Cooking too hot: above 325°F the collagen tightens before it melts, leaving the meat tough
- Cutting immediately: Slicing before resting loses most of the juices onto the board
Storage Tips
- Fridge: Store in the braising liquid in an airtight container for up to 4 days
- Freezer: Freeze with liquid for up to 3 months; the liquid protects texture during freezing
- Reheat: Warm gently in a covered pan on low heat with a splash of broth; never microwave uncovered
Conclusion
Boneless short ribs reward patience and a little technique, and once you apply these five hacks, you will reach for this cut again and again. The sear, the brine, the rest: none of it is complicated, but all of it matters. If you enjoyed this, you might also love our Beef Country Style Ribs guide for another underrated cut worth mastering.
FAQs
Q1: Can I cook boneless short ribs in a slow cooker? Yes. Sear first (do not skip this), then cook on low for 7–8 hours. The result is nearly identical to oven braising.
Q2: What is the difference between boneless and bone-in short ribs? Bone-in ribs add a little extra gelatin to the braising liquid, but boneless short ribs are easier to portion and cook more evenly. For home cooking, boneless is the practical choice.
Q3: Why are my short ribs tough? Either the cooking temperature was too high, or they did not cook long enough. Collagen needs sustained low heat to convert; give it more time before adding liquid or heat.
Q4: Can I make this recipe ahead of time? Absolutely, and it is actually better the next day. The fat solidifies on top overnight in the fridge, making it easy to remove, and the flavors deepen considerably.
Q5: What is the best cut for a boneless short rib recipe? Look for well-marbled pieces from the chuck. Avoid anything that looks very lean — the fat is what makes this cut worth cooking.
