
My First Cottage Cheese Pizza Was a Disaster. Then It Wasn’t
The first time I made a cottage cheese pizza crust, I pulled a soggy, pale disc out of the oven and nearly threw the whole thing in the bin. I hadn’t drained the cottage cheese. Not even a little. The crust spread across the pan like pancake batter, and no amount of extra bake time rescued it. But instead of giving up, I got curious. I drained, I blended, I tested again, and what came out of that second attempt genuinely surprised me. A firm, golden, high-protein crust that has since become a weekly staple in my kitchen.
Looking for more easy keto ideas?
Grab my free eBook (21 Free Keto Recipes) and discover delicious low-carb meals you can make at home!
Why Cottage Cheese Keto Recipes Are Having a Moment and Why This One Earns Its Place
Cottage cheese has quietly become one of the most versatile ingredients in the world of cottage cheese keto recipes. It’s high in casein protein, relatively low in carbohydrates, and critically, it behaves differently from other dairy when you cook with it. Unlike ricotta, which holds moisture stubbornly, cottage cheese releases liquid readily. That’s both its weakness and, once you understand it, its greatest strength.
In this recipe, we’re exploiting that property deliberately. By draining and blending the cottage cheese before baking, you concentrate the protein solids and remove excess whey. What’s left binds with egg and forms a crust that can genuinely support toppings without turning into a wet mess. The protein network set by heat, the same process that firms up a quiche or a frittata, is what gives this crust its structure.
If you’ve been searching for a low-carb pizza that doesn’t taste like cardboard or require specialty flour, this is where your search ends.
Nutritional Profile at a Glance
| Nutrient | Per Serving (1/4 crust) |
|---|---|
| Calories | ~130 kcal |
| Protein | ~14g |
| Total Carbohydrates | ~3g |
| Net Carbs | ~3g |
| Fat | ~6g |
| Sodium | ~280mg |
Note: Values are estimates based on full-fat cottage cheese and two large eggs. Toppings will change these figures. I always recommend entering your specific brands into a nutrition tracker for accuracy.
The Cottage Cheese Pizza Crust Recipe

What You’ll Need

- 1 cup (225g) full-fat cottage cheese, well-drained
- 2 large eggs
- 1/4 cup (25g) grated Parmesan cheese
- 1/2 teaspoon garlic powder
- 1/2 teaspoon dried oregano
- 1/4 teaspoon fine sea salt
- 1/4 teaspoon black pepper
Equipment: fine mesh strainer or cheesecloth, blender or food processor, baking sheet, and parchment paper.
Step 1: Drain the Cottage Cheese Properly

This is the step most people skip and the reason most cottage cheese crusts fail. Spoon your cottage cheese into a fine-mesh strainer set over a bowl and let it drain for at least 20 to 30 minutes. If you’re pressed for time, press gently with the back of a spoon to help the whey release faster. You want to remove as much liquid as possible. I’ve found that full-fat cottage cheese drains better than low-fat and produces a richer-tasting crust, so I always reach for the full-fat version.
Step 2: Blend Until Completely Smooth

Transfer the drained cottage cheese to a blender or food processor and blitz until it’s completely smooth: no curds, no lumps. This is non-negotiable. Unblended curds create uneven texture and moisture pockets that interfere with crust formation. Once smooth, add the eggs, Parmesan, garlic powder, oregano, salt, and pepper, and pulse just until combined. The batter will look loose at this stage; that’s fine.
Step 3: Pre-Bake the Crust

Preheat your oven to 425°F (220°C). Line a baking sheet with parchment paper and lightly mist with cooking spray. Pour the batter onto the prepared sheet and use the back of a spoon or a small offset spatula to spread it into a circle roughly 10 to 11 inches (25–28 cm) in diameter. Aim for an even thickness of about 1/4 inch (6 mm). Thinner edges crisp up beautifully; a thick center takes longer to set.
Bake for 25 to 30 minutes until the surface is dry to the touch, the edges are golden brown, and the center no longer jiggles when you gently shake the pan. This is your Maillard reaction at work; the browning you see on the edges isn’t just cosmetic; it’s where the flavor lives. Don’t rush this stage.
Step 4: Add Toppings and Finish

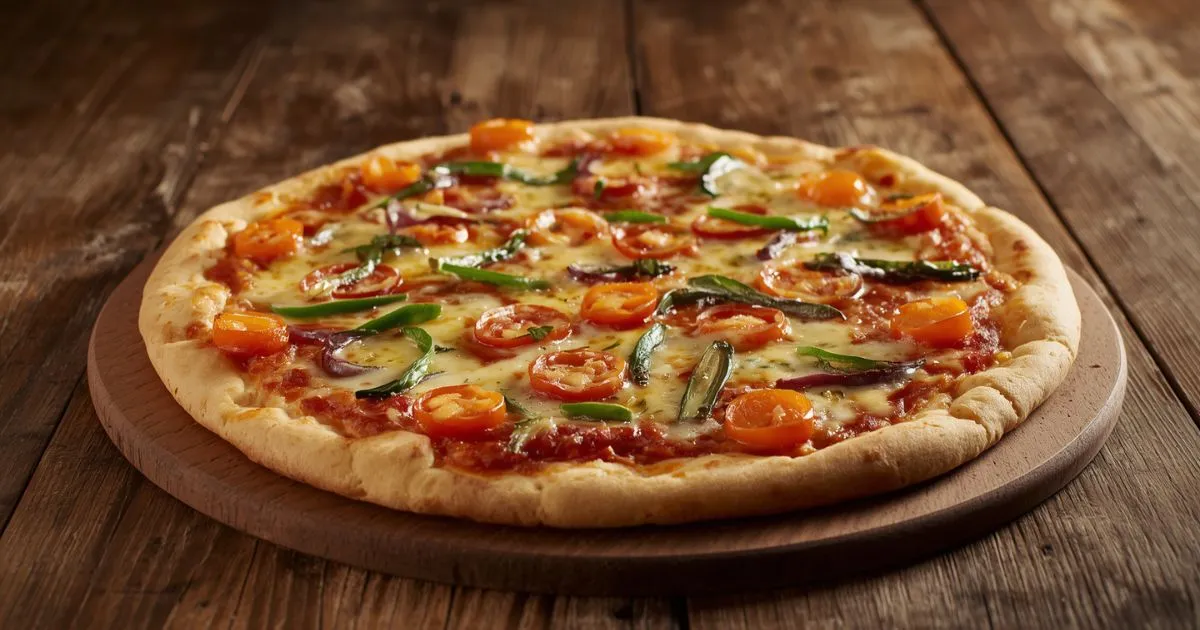
Remove the crust from the oven and add your sauce and toppings. Keep toppings relatively light; this isn’t a deep-dish base. I typically use about 3 tablespoons (45 ml) of low-sugar tomato sauce, a modest handful of shredded mozzarella, and two or three toppings maximum. Return to the oven for 8 to 12 minutes until the cheese is melted and beginning to bubble. Let it rest for 3 to 5 minutes before slicing; this allows the protein structure to firm back up after the heat of the toppings.
Enjoyed this recipe?
Don’t miss my free eBook (21 Free Keto Recipes) with even more low-carb meals to try!
Why This Crust Actually Works: The Science
The science here is straightforward once you understand it. Cottage cheese is primarily water, casein protein, and a small amount of fat. When you drain away the whey and apply heat, the casein proteins denature and coagulate, the same mechanism that firms up eggs in a quiche. The eggs in this recipe accelerate and reinforce that process. The result is a set, sliceable crust rather than a rubbery sheet.
The Parmesan plays a dual role: it adds flavor but also contributes additional protein and fat that improve the crust’s texture and help it brown. In my experience, skipping the Parmesan produces a noticeably paler, slightly softer crust. It’s worth including even if you’re watching your sodium intake; just reduce the added salt accordingly.
Topping Combinations I Keep Coming Back To
Classic Margherita (Keto-Friendly)

- 3 tablespoons (45 ml) crushed San Marzano tomatoes, seasoned with sea salt
- 80g (2.8oz) fresh mozzarella, torn
- Fresh basil leaves added after baking
- A drizzle of extra virgin olive oil
White Garlic and Spinach

- 2 tablespoons (30 ml) garlic butter as the base
- 60g (2oz) baby spinach, wilted
- 80g (2.8oz) shredded mozzarella
- Pinch of red pepper flakes
- 30g (1oz) grated Parmesan to finish
Pepperoni and Roasted Red Pepper

- 3 tablespoons (45 ml) low-sugar marinara
- 70g (2.5oz) sliced pepperoni
- 60g (2oz) roasted red peppers, patted dry
- 80g (2.8oz) shredded mozzarella
Pro tip: Always pat wet toppings (roasted peppers, artichoke hearts, mushrooms) completely dry before adding them. Excess moisture is the enemy of a crisp finish.
Batch Cooking and Meal Prep Guidance
The cottage cheese pizza crust is genuinely meal-prep friendly, something I didn’t fully appreciate until I started making two or three crusts at once on a Sunday afternoon.
To batch prebake, simply double or triple the recipe and use multiple parchment-lined baking sheets. Bake each sheet as directed. Once cooled completely, stack the crusts between sheets of parchment paper to prevent sticking. They hold their shape well and don’t crumble during storage.
On weeknights, pulling out a pre-baked crust, adding toppings, and finishing in a 425°F (220°C) oven for 10 minutes is genuinely faster than delivery. I’ve timed it.
Storage Reference
| State | Method | Duration | Reheating |
|---|---|---|---|
| Pre-baked crust only | Airtight container, parchment between layers | Up to 4 days in fridge | Oven at 425°F (220°C) for 5 min before topping |
| Fully topped and baked | Airtight container | Up to 3 days in fridge | Oven or air fryer at 375°F (190°C) for 6–8 min |
| Pre-baked crust (frozen) | Wrap tightly in plastic wrap, then foil | Up to 2 months | Thaw in fridge overnight, then top and bake |
| Fully topped and baked (frozen) | Flash-freeze on sheet, then wrap | Up to 1 month | Oven at 375°F (190°C) from frozen, 12–15 min |
Avoid the microwave for reheating. It softens the crust significantly and undoes the work of the initial bake. The oven or air fryer is your best option for restoring that crisp edge.
Common Mistakes and How to Fix Them
Mistake 1: Skipping the Drain
The batter will be too loose, the crust will spread too thin, and it will never fully set in the center. Fix: Always drain for a minimum of 20 minutes. For best results, drain overnight in the fridge.
Mistake 2: Not Blending Until Smooth
Curd pockets create inconsistent texture and uneven moisture distribution. Fix: Blend until the mixture is completely smooth — it should look like a thick, uniform cream.
Mistake 3: Pulling the Crust Too Early
If the center still jiggles when you shake the pan, it’s not done. A soft center means the protein hasn’t fully set, and your toppings will make the middle go soggy. Fix: Keep baking until the surface is completely dry and the edges are clearly golden.
Mistake 4: Overloading with Toppings
This crust has a protein-based structure, not a gluten-based one, so it has limits. Too many heavy or wet toppings will overwhelm it. Fix: Keep toppings lean and always pat vegetables dry before using them.
Mistake 5: Using Low-Fat Cottage Cheese
Lower fat means higher water content and less flavor. The crust tends to be paler, softer, and less satisfying. Fix: Use full-fat cottage cheese wherever possible.
Frequently Asked Questions
Can I make the cottage cheese pizza crust without eggs?
I’ve tested this, and the honest answer is “not successfully with this method.” The eggs are what give the crust its structural integrity; without them, the cottage cheese protein alone doesn’t bind firmly enough to support toppings. If you need an egg-free version, you’d need to explore a different base recipe using a binding agent like psyllium husk, which changes the recipe significantly.
Is cottage cheese pizza crust actually keto?
Yes, this is one of the most genuinely keto-friendly pizza crusts you can make. With approximately 3g of net carbs per serving for the crust alone (before toppings), it fits comfortably within standard ketogenic macros. It’s one of those cottage cheese keto recipes that genuinely earns the label rather than just approximating it.
Can I use a blender instead of a food processor?
Absolutely. A standard upright blender works well here; in fact, I often prefer it because it produces a slightly smoother result than my food processor. Just make sure to scrape down the sides midway through blending to ensure there are no unblended curds hiding at the bottom.
Why does my cottage cheese pizza crust come out rubbery?
A rubbery texture usually means one of two things: either the crust was underbaked in the pre-bake stage or the ratio of egg to cottage cheese was off. Make sure you’re using exactly two eggs per cup of cottage cheese. Overbaking by 5 extra minutes is almost always better than underbaking when it comes to crust texture.
Can I make this in an air fryer?
Yes, with some adjustments. Use a smaller quantity of batter to fit your air fryer basket (about half a recipe), spread it onto air fryer-safe parchment, and cook at 375°F (190°C) for 12 to 15 minutes. Check regularly; air fryers vary considerably in their heat distribution. The crust won’t get as evenly golden as it does in a conventional oven, but it works well.
How do I know when the pre-bake stage is done?
Three signs: the surface should be completely dry to the touch with no wet spots, the edges should be visibly golden brown, and the crust should release cleanly from the parchment when you gently lift one edge with a spatula. If any of those three things haven’t happened, give it another 3 to 5 minutes.
Can I use this cottage cheese pizza crust recipe for calzones or pizza rolls?
This crust is too delicate to fold or roll without cracking; it behaves more like a firm egg crepe than a traditional dough. For calzone-style wraps, you’d need a different low-carb dough with more elasticity, such as fathead dough. This particular recipe is best enjoyed as a flat, open-faced pizza.
What’s the difference between using full-fat and low-fat cottage cheese?
Beyond the nutrition difference, the practical cooking difference is significant. Full-fat cottage cheese drains more cleanly, blends smoother, browns more readily due to the fat content contributing to the Maillard reaction, and produces a noticeably richer, more satisfying crust. Low-fat versions work in a pinch, but I recommend full-fat for the best result every time.
