
Most people quit meal prep after one weekend, and it is rarely for lack of willpower. The usual pattern: six recipes chosen from social media, three hours at the stove on Sunday, a fridge packed to the door, and by Thursday half the containers are soggy, boring, or past their safe window. If you want to know how to start meal prepping without burning out, the answer is to begin smaller than feels worthwhile, choose food that actually survives a few days in the fridge, and follow a simple order of work. This guide walks you through seven beginner steps, the food science behind what holds up, and the mistakes that sink most first attempts.
What Meal Prep Means (and the Three Ways to Do It)
Meal prep is any work you do ahead of time so a future meal takes less effort. It does not have to mean identical boxed lunches. There are three main styles, and beginners do best when they pick one rather than mixing all three in the first week.
| Style | What you do on prep day | Best for | Trade-off |
|---|---|---|---|
| Full meals | Cook complete dishes and divide them into single portions. | Work lunches, people who want zero weekday cooking | Most repetitive; limited to food that reheats well |
| Ingredient prep | Wash and chop vegetables, cook a grain, roast a protein, mix a sauce | Families and anyone who dislikes eating the same meal twice | You still assemble or finish cooking on weeknights. |
| Freeze-ahead | Cook soups, stews, or casseroles in bulk and freeze portions. | Irregular schedules, cooking for one | Needs freezer space and thawing time |
If you are unsure, start with ingredient prep. It is the most forgiving: a container of roasted vegetables and a pot of quinoa can become a bowl, a wrap, or a side dish, so nothing has to be eaten in exactly the form you planned.
How to Start Meal Prepping in 7 Easy Steps
Step 1: Cover one meal, not the whole week.
Pick the meal that causes the most trouble. For many people that is weekday lunch, because the alternative is buying something near work. For others it is dinner on the two or three busiest evenings. Prepping that one meal for three or four days is a complete, successful first week. Breakfasts, snacks, and weekend meals can come later, once the routine feels easy.
Step 2: Choose two or three recipes that reheat well.
Two recipes, each made in a batch of two or three portions, cover most of a working week. Choose dishes that tolerate a few days of storage and a microwave: braised or roasted chicken, chili, curries, lentil or bean soups, grain bowls, roasted root vegetables, and baked egg dishes. Leave crisp fried foods, dressed leafy salads, and delicate fish for nights when you cook fresh. For filling combinations, the ideas in our guide to high-protein, high-fiber meals translate easily into prep containers.
Step 3: Plan portions and containers before you shop.
Write down exactly how many portions you need and which day each one will be eaten. This single list decides how much to buy and which meals belong in the freezer rather than the fridge (more on that in Step 6). Build each container around a protein, a vegetable, and a slow-digesting carbohydrate; if you want a practical way to size the protein, our explainer on good protein foods and how to reach about 30 g per meal gives realistic portion examples.
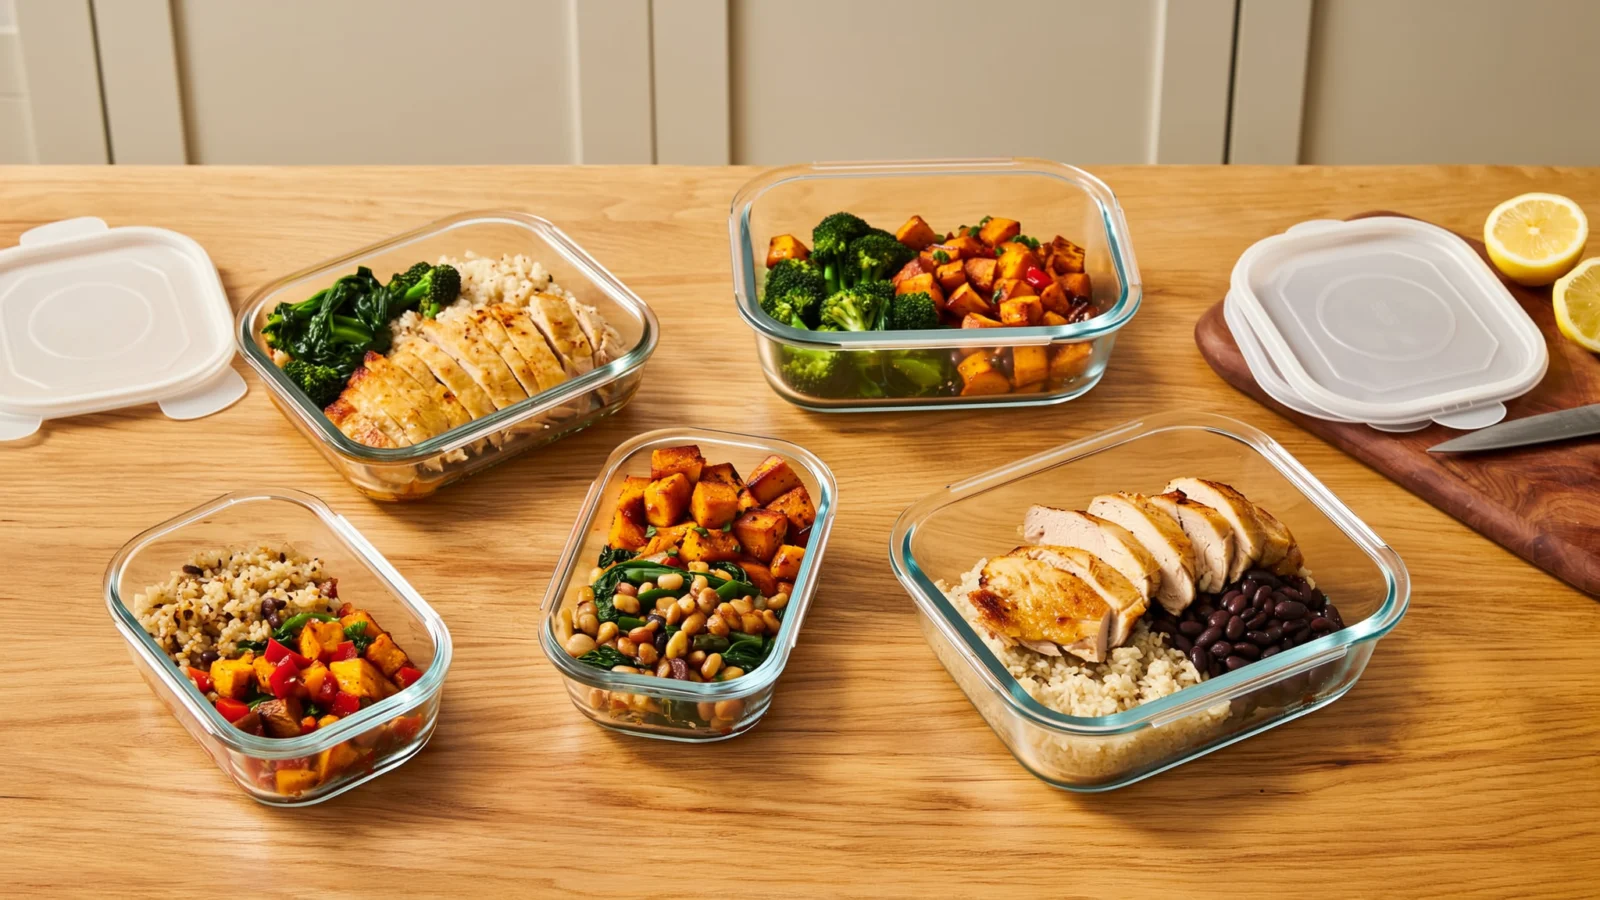
Containers matter more than most beginners expect. Glass with snap lids reheats evenly and does not hold odors; whichever material you choose, check that it is labeled microwave-safe before reheating in it, and buy shallow rather than deep containers so food cools faster.
| A sample first week (lunches only) | What to prepare | Where it is stored |
|---|---|---|
| Monday and Tuesday | Roasted chicken, roasted broccoli, cooked quinoa | Fridge |
| Wednesday | Chickpea and sweet potato grain bowl, dressing packed separately | Fridge |
| Thursday | Lentil soup | Freezer, moved to the fridge Wednesday night |
Step 4: Shop from a list built around the plan.
Turn the plan into a list grouped by store section, and check the pantry first so you do not buy a third jar of cumin. Two recipes that share ingredients (one onion split between both, one bag of spinach used twice) keep costs and waste down. Canned beans, frozen vegetables, and pre-shredded cabbage or carrots are legitimate shortcuts; they cut prep time without changing the nutrition much.
Step 5: Prep in the right order
The biggest time saver is sequence, not knife speed; our plan for cooking 5 meals in 1 hour shows it minute by minute. Work from the longest, most hands-off task to the shortest:
- Start the oven first. Preheat while you unpack groceries; anything roasting needs the most time and the least attention.
- Get grains and soups simmering next. Rice, quinoa, and lentils cook on their own once the lid is on.
- Chop while things cook. Prep raw vegetables and mix sauces during the oven and stovetop time instead of before it.
- Finish with quick stovetop cooking. Ground meat, sautéed vegetables, and anything that needs stirring come last.
- Clean as you go. Wash a cutting board or pot during each waiting period so the session ends with a clear counter.
Use a food thermometer rather than color to judge meat. Poultry, including ground turkey and chicken, should reach 165°F (74°C), and ground beef or pork 160°F (71°C), according to the FoodSafety.gov safe minimum internal temperature chart.

Step 6: Cool, pack, and label safely.
This is the step beginners most often get wrong. Cooked food should go into the fridge within two hours of coming off the heat, and leaving a big pot on the stove to cool overnight is not safe. Divide food into shallow containers so the center chills quickly; you do not need to wait for it to reach room temperature before refrigerating. Label each container with the dish and the date it was cooked.
The USDA’s leftovers guidance gives three to four days in the refrigerator for cooked leftovers. That window is why a five-day plan should not live entirely in the fridge: freeze the portions meant for days four and five on prep day, then move them to the fridge the night before you need them.
Step 7: Reheat properly, then review the week.
Reheat leftovers until they are steaming hot, at 165°F (74°C) in the center. Cover the container loosely and stir halfway through microwaving so there are no cold spots. Add a tablespoon of water to rice or quinoa before reheating to restore moisture. At the end of the week, note what you actually ate, what you got tired of, and what went to waste. That short review is what turns a one-time experiment into a routine.
Why Some Foods Hold Up and Others Don’t
Understanding a few kitchen science basics makes recipe choices much easier.
Starch retrogradation. When cooked rice, pasta, or potatoes cool, their starch molecules gradually realign into a tighter, more ordered structure. That is why refrigerated rice turns firm and dry. Gentle reheating with a little added moisture loosens the structure again, which is why a splash of water or broth helps.
Moisture migration. In a sealed container, water moves from wet components into dry ones. A sauce poured over roasted vegetables softens them by day two, and dressing turns greens limp within hours. Packing sauces and dressings separately keeps textures intact.
Enzymatic browning. Cut avocado, apple, and banana brown when enzymes in the fruit react with oxygen. Acid slows it, but these ingredients are still best added on the day you eat them.
The temperature danger zone. Bacteria multiply fastest between 40°F and 140°F (4°C and 60°C). Shallow containers and prompt refrigeration move food through that range quickly, which matters more for batch cooking than for a single dinner because the volumes are larger.
Best and Worst Foods for Beginner Meal Prep
| Food | How it holds up | Tip |
|---|---|---|
| Chicken thighs | Very well; stay moist when reheated. | Slice after cooling, not before, to keep juices in. |
| Chicken breast | Fair; dries out if overcooked | Pull at 165°F (74°C) exactly and store with a little sauce. |
| Lentil and bean soups, chili | Excellent; flavor often improves after a day. | Freeze half the batch on prep day. |
| Roasted root vegetables | Very well | Roast until well browned so they do not go mushy. |
| Quinoa, brown rice, farro | Well, | Spread out to cool, and reheat with a splash of water. |
| Hard-cooked eggs | Well, in the shell | Peel the day you eat them. |
| Leafy salads with dressing | Poorly | Store greens dry and dressing separately. |
| Fried or breaded foods | Poorly; the coating goes soft. | Cook these fresh instead. |
| Cooked fish | Fair; texture and smell suffer on reheating. | Eat within a day or two, or serve cold in a salad. |
Meal Prep Storage Reference
Use this table as a quick guide; when in doubt, follow the shorter time. Freezer times refer to best quality: food kept frozen at 0°F (−18°C) stays safe longer but slowly loses texture and flavor.
| Prepared food | Refrigerator (40°F / 4°C or below) | Freezer (0°F / −18°C) |
|---|---|---|
| Cooked chicken or turkey | 3 to 4 days | 2 to 6 months |
| Soups and stews | 3 to 4 days | 2 to 3 months |
| Cooked grains and pasta | 3 to 4 days | Freeze in flat bags; best used within a couple of months. |
| Cooked ground meat dishes | 3 to 4 days | 2 to 3 months |
| Hard-cooked eggs | 1 week | Not recommended |
| Washed, cut raw vegetables | Best within a few days; discard if slimy | Blanch first, or use only for cooking. |
Meal Prep Tips: 7 Mistakes That Make Beginners Quit
These are the problems that show up again and again in first attempts, along with a practical fix for each.
| Mistake | Why it backfires | What to do instead |
|---|---|---|
| Prepping every meal for seven days | It takes hours, and later portions pass the safe fridge window. | Cover one meal for three or four days. |
| Cooking new, complicated recipes | Unfamiliar steps double the session time. | Use recipes you have cooked before, or very simple ones. |
| Eating the identical meal every day | Boredom leads to skipped containers and takeout. | Prep components and combine them differently |
| Letting food cool on the counter for hours | Keeps food in the danger zone too long | Refrigerate in shallow containers within two hours |
| Dressing salads and saucing everything ahead | Moisture migration makes food soggy | Pack wet components separately |
| No labels or dates | You lose track of what is still safe to eat | Write the dish and cook date on every container |
| Skipping the freezer | Days four and five go to waste or become a risk | Freeze late-week portions on prep day |
A slow cooker can also take a large share of the work off your hands. Our collection of healthy crockpot recipes for low-calorie meals includes dishes that portion and freeze well.
Frequently Asked Questions
How do I start meal prepping if I have never cooked much?
Start with one or two very simple dishes, such as a sheet pan of roasted chicken and vegetables plus a pot of rice or quinoa, and prep just three days of one meal. That is the easiest way to learn how to meal prep without wasting food or time.
How long does a beginner meal prep session take?
For two recipes covering three or four days of one meal, plan on about one to two hours, including cleanup. The first session usually takes longest; once you know your recipes and the order of work, the time drops.
How many days in advance can I meal prep?
Plan to eat refrigerated cooked meals within three to four days. For a full working week, freeze the portions for the last one or two days and thaw them in the fridge overnight.
Is it safe to put hot food straight into the fridge?
Yes. Food safety agencies advise refrigerating cooked food within two hours rather than waiting for it to cool completely. Divide large batches into shallow containers so they chill quickly and do not warm up the rest of the fridge.
What should I meal prep first: breakfast, lunch, or dinner?
Choose the meal you most often skip or replace with takeout. For many office workers that is lunch; for parents it is often dinner. Covering that one meal is the most useful meal prep tip for a first week.
Do I need special meal prep containers?
No, but containers that seal well, stack, and are microwave-safe make the habit much easier. Glass handles reheating and odors best; lightweight plastic is easier to carry. Shallow containers cool food faster than deep ones.
How do I keep meal prep from getting boring?
Prep components instead of finished meals, rotate one recipe each week, and change sauces and toppings. The same roasted chicken tastes very different with salsa, a lemon-tahini dressing, or a peanut sauce.
Can meal prep help me eat healthier?
It makes balanced choices easier, because a planned meal is already waiting when you are hungry and short on time. The overall effect still depends on what you prepare and your own needs; a registered dietitian can help if you have specific health goals.
Your First Week Starts Small
Meal prep works when it fits your schedule rather than an idealized one. Cover one meal, cook two recipes you trust, store them safely, and freeze anything meant for late in the week. After a couple of weeks, add a second meal or a new recipe. Small, repeatable sessions are what make the habit last.
